Exporting your video from Ulead Mediastudio Pro 7Essentially this part is very very easy, but there are some things here that people make mistakes on so it's worth going through what you need to do. Firstly, your export settings should be identical to your project settings in every way but the codec. This means that in order to get the same looking amv out of your project that you saw in the preview window then you need to keep all the settings exactly the same. The only exception to this rule, as I have said is the codec. Secondly, in this guide we are going to export the audio separately as well as part of the video file - this will give us easy access to the audio stream later on. Also, this guide is geared towards compression
with software codecs - if you are using the features of a hardware
video editing card (such as a DV card) then you should consult the
manual for that card. Of course, it should be equally possible to still
use these settings but you will lose any realtime rendering benefits
(and archiving benefits with DV). Exporting the VideoGo to File menu > Create > Video File... 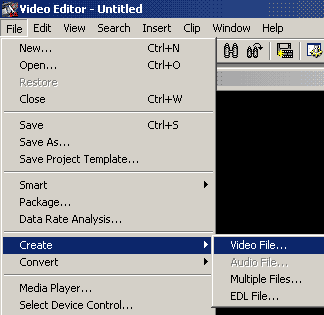 You will the see a box like this:
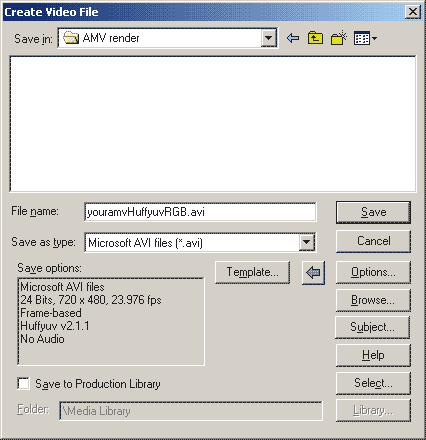 Locate an appropriate folder and enter a name
such as the one above.
Unless you are exporting for your DV, you should choose Microsoft AVI files (*.avi) in Save as Type. Now click Options... to change the settings of the default template. 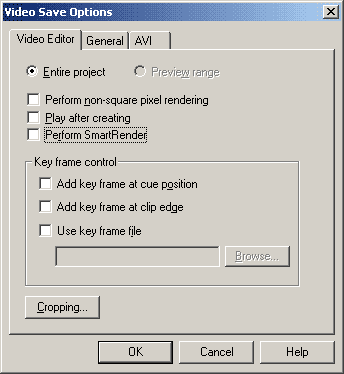 You will notice that many of the defaults have
been deselected here. Let me go through each setting so you know why.
Entire Project vs Preview Range: I did not have a preview range selected when I made this screencap. This will decide how much of the project timeline is exported. Entire project means the whole thing and Preview range will only export the section you have selected.General Settings menu: 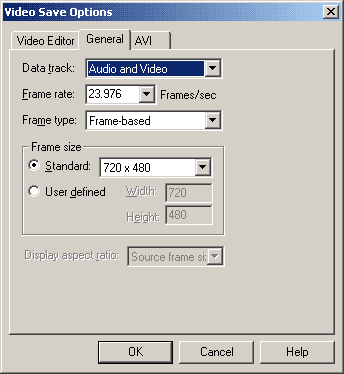 Data Track: Audio and Video will export
both into one avi file. This is fine although we don't need the audio
here as we will also export it separately.
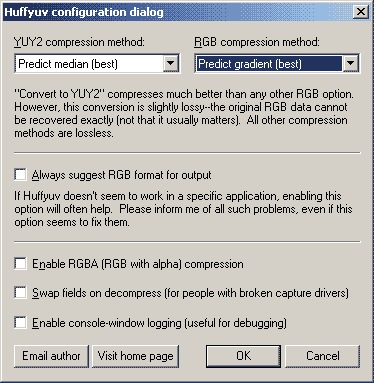
Frame Rate: This should be identical to you source. 23.976 if using FILM, 29.97 if using full NTSC and 25fps if using PAL. Frame Size: The standard frame rate is fine unless your project has a different one, in which case you should use the User Defined options. AVI Settings Menu: 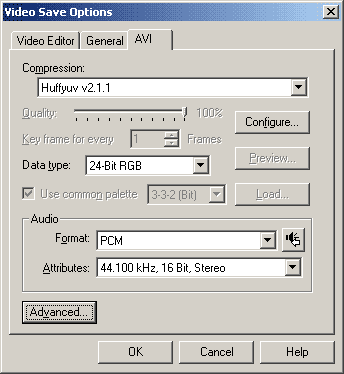 Compression: This is the important part. There are only 2 things you could ever want to choose here - HuffYUV (included in the AMVapp) or Uncompressed (unless you are using the native options of a hardware card). Occasionally I get errors with my HuffYUV files which result in what I call 'dirty frames'. This could be just my system but whenever this happens I resort to using uncompressed RGB. It's big as hell but it works. To make sure that HuffYUV compresses the footage in RGB mode, and to set up other options, choose 'Configure' next to the compressor.
In RGB compression method you should always have Predict
Gradient (best) selected. This will make sure that when Ulead
sends the codec RGB footage that it is compressed as RGB and not as
YUY2. Data Type: You should choose 24-bit RGB when converting to huffyuv.Once you have all those set, let's look at the last menu that you can access by clicking the Advanced...button. 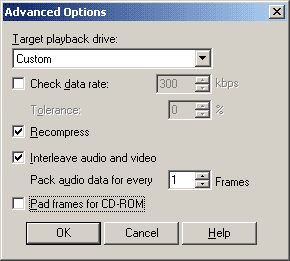 Data Rate will not be needed in your encode but Recompress will and should always be selected.You should now be good to go. Click ok until you are back to the save file box, check your filename is correct and export that video. Be warned, these files are big. If you are using Windows 2000 or XP make sure that you export to a hard drive that uses the NTFS file system otherwise long amvs might exceed the 2 gig file limit on old FAT32 drives. If you are running windows 98 then you are going to be limited to 2 gig - if you can't export the whole movie for this reason then you will have to select a frame range and export it in two or more sections. You can join these later in AVIsynth as follows:
Hopefully this wont be necessary and you can export the whole thing. Make sure you have enough space on your drive - you'll need around 2 to 4 gig for a video. Once you've exported your video, you can export your audio stream separately for easy access. Exporting the Audio as a Wav file.Again, go to File > Create... but this time choose Audio FileYou will see a box like this: 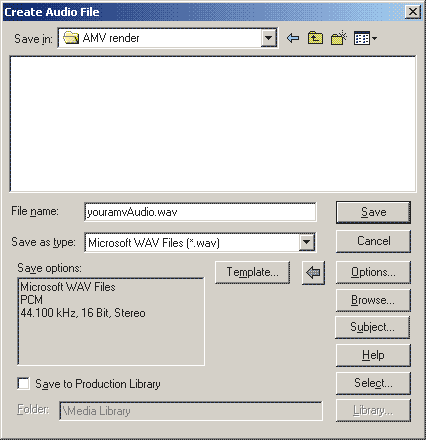 This time, however, Save as type should be Microsoft WAV Files (*.wav) Now click Options... 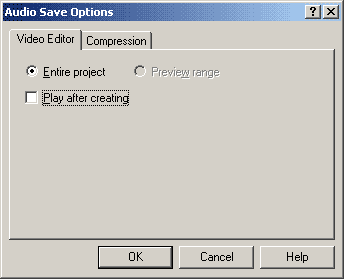 Pretty simple stuff - the range setting should
be exactly the same as the video you exported.
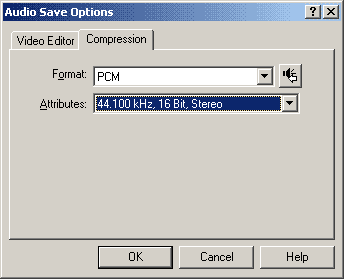
Click OK to return to the save box and
save that audio stream.
You now have master video and audio files exported ready to be made into distribution copies.
|