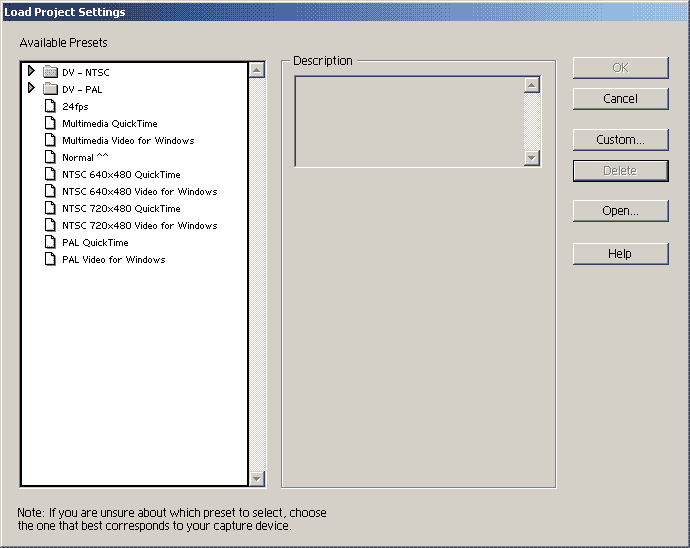
Setting up Your Premiere 5.x/6.x ProjectWhen starting a project there are many options that will govern the way Premiere will look at your footage. These are very important if you want to have the best quality you can in your video. So, I'll quickly demonstrate the options you should use for different kinds of projects. When you open the new project window (File > New Project)
you may see that Premiere has some default profiles (I dont recall if
this is true of Premiere 5 or not).
If you are a DV user, particularly if you have intergrated DV
hardware then you may want to search for a profile that fits your
device. If you are a Video for Windows user then ignore every single
profile and click Custom... to make your own. In the picture
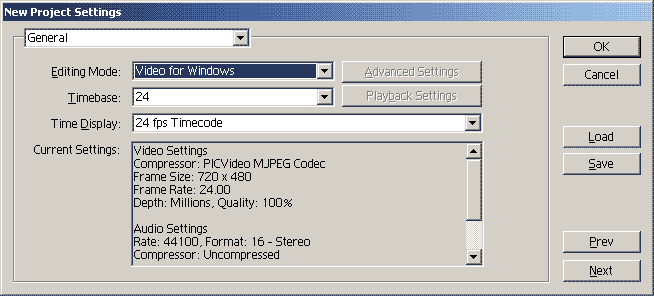
above I have one saved which I use for 24fps editing. When you click custom you will get something a little like
this:
You may find that it is set to Microsoft DV. If
you are editing AVI files or AVS files with Video for Windows then
change the Editing Mode accordingly.
Timebase: This is important. If you are editing 29.97fps NTSC footage then choose 29.97. If you are editing FILM footage then choose 24 and be sure that your imported footage is 24fps. Do NOT use the 23.98 timebase. It sucks and will cause all sorts of problems. 25fps should be chosen for PAL. Time Display: This is less important and can be anything you want but you should choose something that matched your timebase such as 24fps above. 29.97fps users will want to choose the 30fps Drop-frame Timebase. You can have premiere display frame numbers or all sorts of other things if you like. Now that you have these basics set, click the drop-down menu that currently says General and select Video: 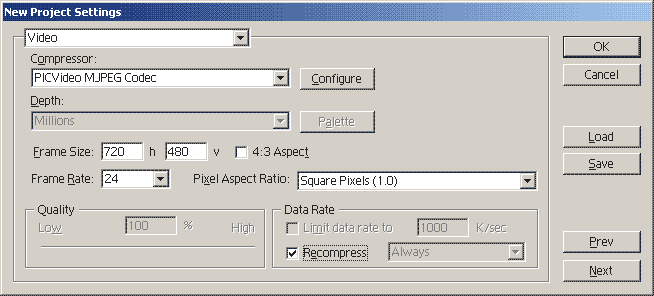 This window will decide several things.
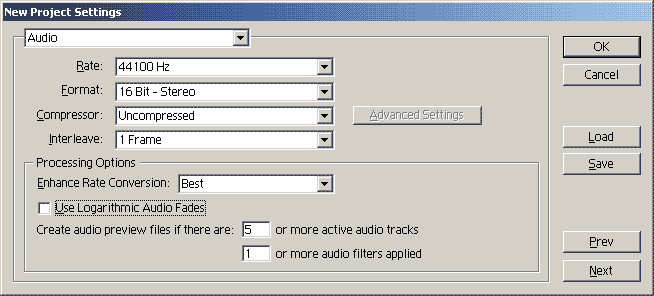
Next we have the Audio options:
Format - 16bit stereo will be the one you'll almost always need as it is the format used by CDs and DVDs. Computer sampled audio may be a higher bitrate and some internet audio files will be lower. If you are unsure then check your source file. Compressor - This should always be uncompressed. Two things you will learn about Premiere are that a) you should only ever import uncompressed audio and b) you should only ever export uncompressed audio too. Interleaving should be left at 1 frame. Processing Options are fine at their defaults. If you like you can use logarithmic audio fades (they more closely match the way the human ear works) however this option should not be changed at any point between the project and the export as the fades will sounds very different if it changes. Next we have the Keyframe and Rendering options: 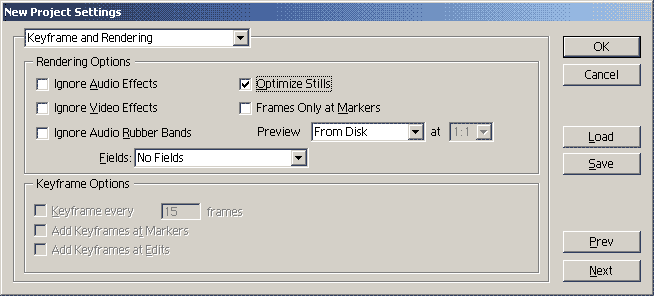 Of the options here, most are self-explanatory
and only some are useful. All the "ignore" options should be, aptly,
ignored.
Optimise Stills will speed up the encoding of stills. Not a necessity but useful all the same. Personally I turn this off for exporting as it can sometimes give odd results, but for previewing it's fine. Fields is a very important option. You can make everything instantly ugly by setting this incorrectly. If you set a field order and you are actually using non-interlaced footage then Premiere will add interlacing to your footage when processing effects like fades and so on. This is bad. Likewise if you set an incorrect field order then Premiere will process the fields wrong and give you jerky-looking motion in your video. This is equally nasty and cannot be fixed after exporting. For progressive footage set fields to No Fields and for interlaced footage choose the correct field order (Upper or Lower) as you worked it out earlier. That should be all the options you need for your project and you should be ready to go. Project settings are mostly easy to change in the middle of a project but you should NEVER change anything to do with fps. Codecs and frame size you can change if you need to - fps you should never change unless you want to run the risk of messing up all your edits. Configuring Premiere's Save OptionsThis is an important step that many people skip and then curse themselves for later when they lose their entire project.Go to Video > Edit > Auto Save and Undo... 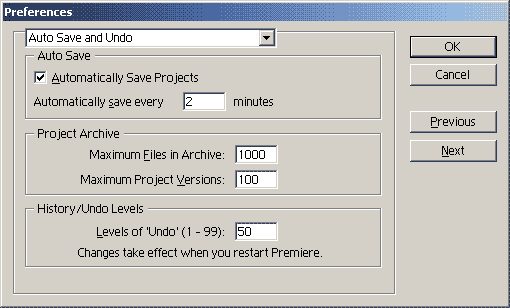 These are my Auto Save settings and, yes, they
are pretty serious. Automatically Save Project is selected and
the time set for every 2 minutes.
Why so often, you may ask? Well the reason is that Premiere has the ability to create a Project Archive which is a collection of versions of Premiere Project files. As the actual project file itselsf is a small text file, it's not going to take up much space. However if you lose that little text file or it becomes corrupt then you have lost your entire video. Hence, I set the Project Archive to allow as many revisions of my project as possible by putting Maximum Files in Archive to 1000 and Maximum Project Versions to 100. Every 2 minutes my project is saved and a copy of this project is made in my Adobe/Premiere/Project-Archive folder. This means that if Premiere happens to crash and for some reason my project file is ruined, I have a copy that was made earlier... in fact I have 100 versions of this project file. This makes it incredibly unlikely that I will ever lose much work due to a crash as even if I lose my project file I can get a copy that was made just before everything went wrong even if things went wrong a few hours ago. Also, because I regularly save my files under new names when I've completed a new section I get 100 copies for each filename (with a maximum of 1000 files in the archive). Looking in my project archive now I can see enough files that I'd be able to track every single editing step I made in my video Aim for Victory. The Undo levels (the amount of times you can undo commands) can be set up to a maximum of 99 but note that the higher you set this the more memory Premiere will use and this can be sluggish when you have an undo history filled with lots of complex commands. That should be about everything you need to know before editing in Premiere. Look after your project files, take care with your settings and back up regularly and everything will be fine.
|
