Using CDs for your audioI'm sure you probably already have your own method of CD audio extraction. It may be pretty good. It may well even be this one. However, if you haven't considered the possibility that ripping audio from cds isn't always perfect then you need to read this guide. CDs are digitally stored audio, yes. So, extracting it should be a simple case of copying the bits right? Well, yes. However, there is one little problem. Red Book This is the disc format used for storing your audio content. It has it's advantages but it can't be used like any old data cd where you can just copy a file. You can see the tracks if you open it in windows but these are just pointer files. You need to extract the audio. Unfortunately, unlike other data storage methods used in cd-roms, the Red Book standard isn't that superb for data extraction. Scratched and/or otherwise damaged cds may seem like they've extracted fine but actually be full of errors. These little errors can put a spanner in the works so you need an extraction program that will be able to tell if anything's gone wrong, test the file and pick the right extraction method for your cd-rom drive. Also, many modern songs have sub-audio data that some read methods may not pick up. In short, you need 2 things: 1) You need
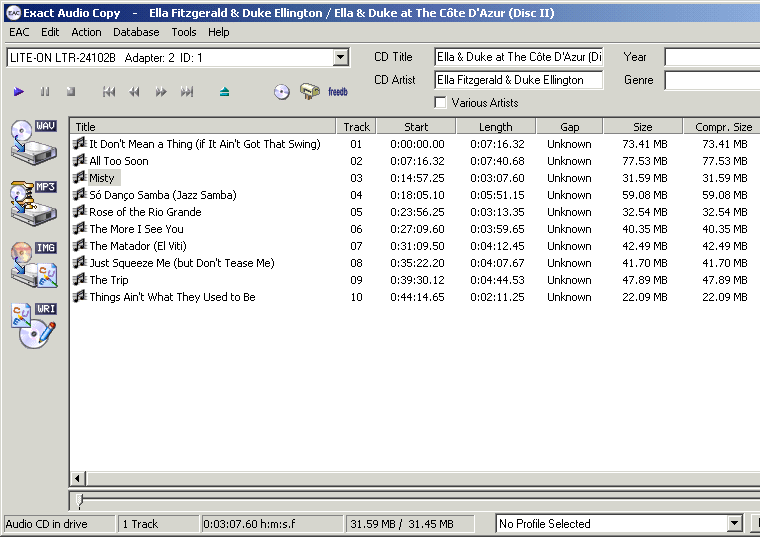
EAC (Exact Audio Copy). Now, you're probably wondering what 2) is all about. Well, in order to accurately extract audio (and rip dvds etc.) form a cd you really need aninterface called an ASPI layer. If you have Windows 98 or ME then you may already have one. If you have Windows 2000 or XP, then you may need to get one as ASPI drivers aren't included by default. To find out if you have an ASPI layer use the ASPI Checker program from here. The ASPI driver is installed as part of Adaptec's SCSI drivers but if you don't have a SCSI card you can still install an ASPI layer using a program call ForceASPI which you can get from here and it will allow you to install the drivers without having an adaptec card. It also comes with the most stable version of the drivers and works with everything that isn't Widows 95. For more aspi related information look here. NOTE: READ THE INSTRUCTIONS CAREFULLY when installing this - making sure you have made the necessary backups. Don't come crying to me if you kill your OS. Thankfully, new versions of EAC don't require ASPI layers but it is the best method so, if you can install it safely, then please do. Download it, unpack it and follow the instructions in the html file. OK, now that you are all ASPIed up, load EAC. I will now go through the basic method of extracting the audio correctly with this program. You can fiddle with the other options yourself if you like but this will get the best extraction you can get: EAC Basic Setup Select the cd-rom drive that you believe will have the best read abilities. CD-Writers often have better read abilities but just in case, you probably want to follow the first few instructions for both to see which one works best. Put in an audio cd (anything that isn't Linkin Park will do nicely) [optional] Press Alt+G to get the cd information from freedb. Once that is done, EAC should look a little something like this: |
||
 |
||
|
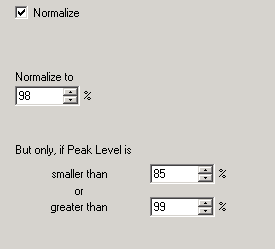
Now go into EAC -> EAC options (F9). In here, most of the defaults are fine but if there's anything you think you'd like to enable, have a browse around. The one thing I would recommend is going to the Normalisation tab. Normalisation Normalisation is the process of making the audio loud without clipping anything due to quantization errors. It's a "good thing" and really should be done with all of your sources (there will be a normalisation method described in each of the sections. I personally think the defaults (shown below) are pretty good for normalising the audio where necessary.
Setting the Read Options Now, OK out of there and go into EAC -> Drive Options (F10) This is where you may start to get confused by the options. Don't worry, though, EAC has some excellent detection procedures that can work out what read features your drive has. You should try these out on all your drives to see which comes out best. Extraction Method tab: Click the "Detect Read Features" box and wait. With any luck you have a drive that has the "Accurate Stream" feature. Leave the settings as they are once you have run the test. Next, get a cd you know to be scratched and run the C2 test. Again, let the test change any settings. Drive tab: click "Autodetect Read Command" Offset tab: Click "Detect read sample offset correction" Gap Detection: only change if you know what you are doing ^_^
You don't need to ^_^... but... EAC has a nice function where you can set up your desired compression options which is great for making mp3s and luckily you still have the option to make an uncompressed wav if you want. I generally setup an external compressor (lameMP3) and do a 192 average bitrate mp3 for my mp3s but this is a little off-topic as what we need is uncompressed WAVs. Extracting the Audio Once you've set everything up, select the track or tracks you want then choose Action -> Test and Copy Selected Tracks -> Uncompressed (F6). The test method will obtain a CRC reading for the original and the extracted audio and compare them - it's basically a data corruption detection. The program does some other stuff too but all you need to know is that this will then extract the audio with the best read method possible, test that it has been extracted correctly then finally normalise (optional) and save it.
With any luck, when you get the report at the end you will have an error-free extraction. Congratulations.
|